All positive comments you get for a survey can be published as a testimonial if the customer consented. We offer an interface for moderation of all testimonials and a widget to embed it into your Shopify store. To do so follow these steps:
Open the Callexa-App from your Shopify admin panel and click the "Testimonals" button in the navigation bar. You will see two lists next to each other. The first list contains all comments for which the customer gave consent for publication.
Chose one and hit the green checkmark button. You can now edit the text, for example to remove spelling mistakes or personal data. The last name of the customer is automatically trimmed to its first letter. When you are done, hit the "Confirm" button.
The testimonial now moved to the other list, which contains all "published" testimonials. You can remove a testimonial at any time and it will move back to the first list. If a comment doesn't suit you, just click the button with the crossed out eye to hide it.
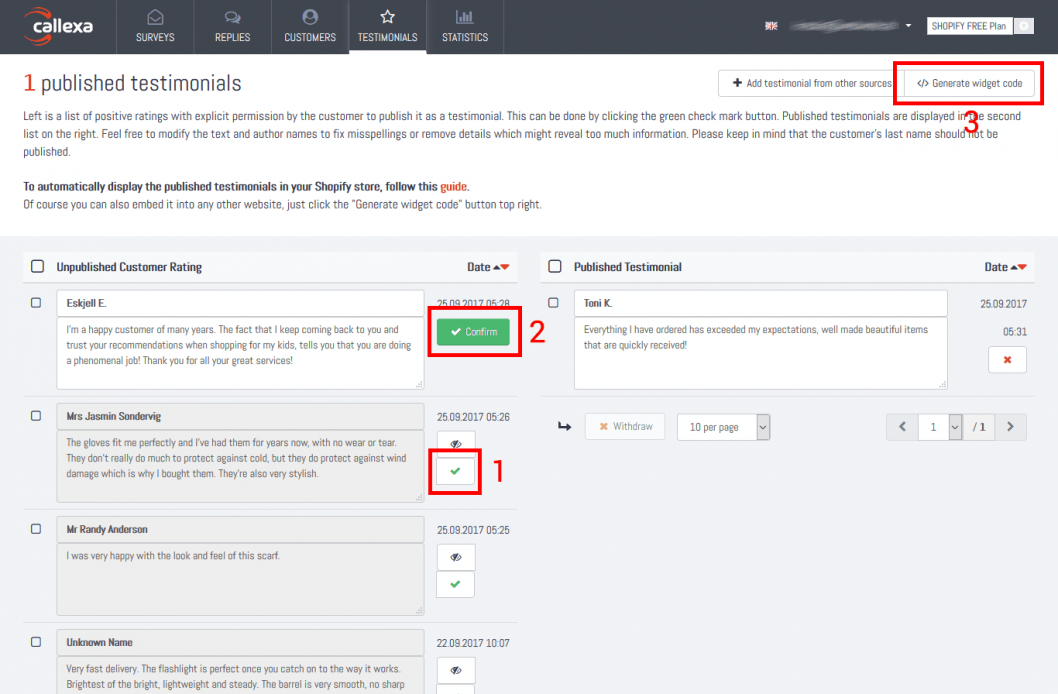
Now you are wondering where to see these "published" testimonials? To actually display them somewhere, you need to embed the reviews widget in the appropriate place. Click on the "Generate widget code" button at the top right of the screen and configure the widget according to your ideas. If you want to publish the testimonials on a separate page of your homepage, then it is best to use the type "List". With the type "Web seal" you can implement a seal at the bottom of the web page. Use the preview to find the perfect widget for you.
You can find more information about review widgets in our article https://www.callexa.com/en/p/nps/widgets under "Testimonials Widget".
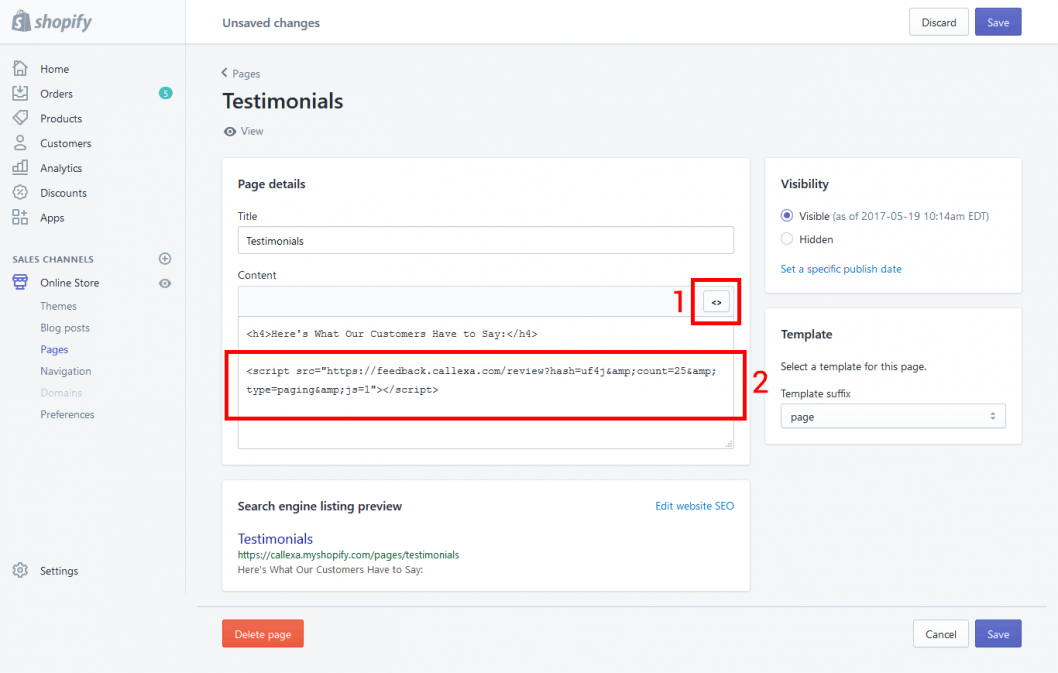
Then copy the code from the grey text box to the clipboard.
(select the entire line and press Ctrl+C).

Switch back to your Shopify admin panel and navigate to "Sales Channels > Online Store > Pages". Add a page and name it e.g. "Testimonials".
Write a headline and a short intro text, then click the "<>" Button top right of the editor tool bar. Put the cursor at the end of the text and hit ctrl+v to paste the widget code from the clipboard.
Note: The widget will not get displayed in the editor pane, as there is no preview available for script codes.
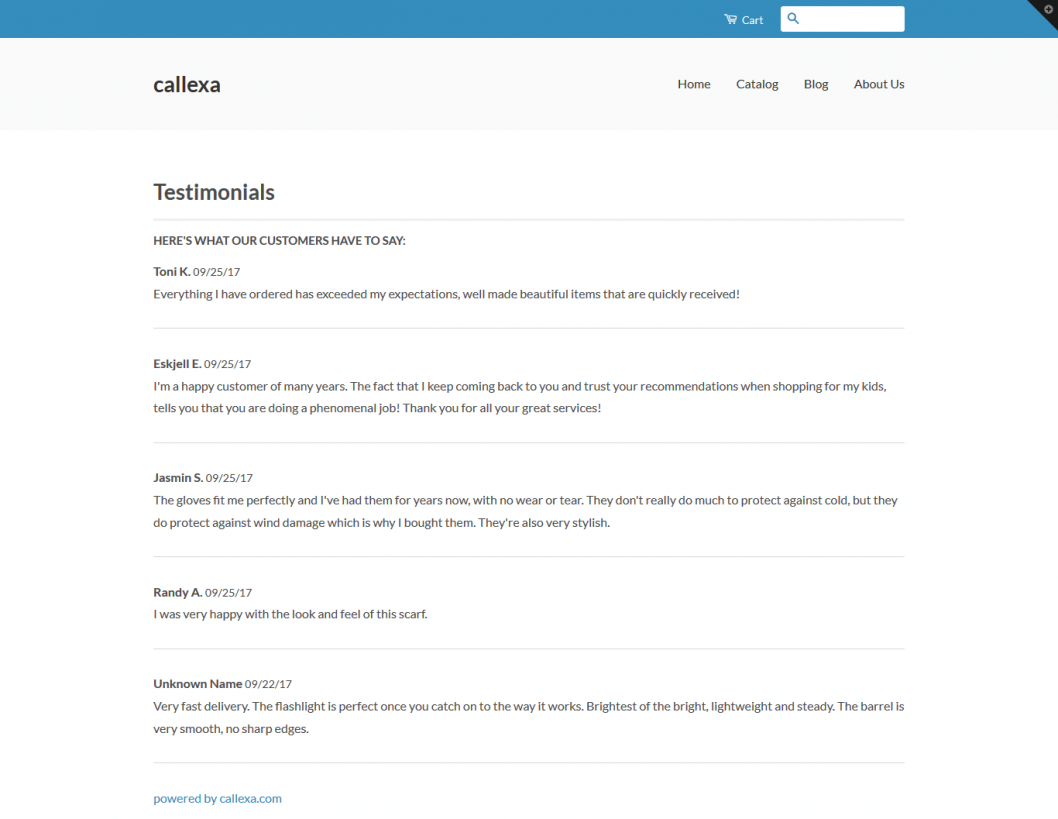
Save the page and click the "View" button above the editor. You should now see all the testimonials you published in step 1 getting loaded from Callexa Feedback right into your store.
You should also add the testimonials page to one of your navigation menus, e.g. the footer. To do so navigate to "Sales Channels > Online Store > Navigation", select the "Footer" menu and click "Add menu item".
From now on all you have to do is regularly publish new testimonials and they will automatically appear in your Shopify store. The widget code stays unchanged, so you do not need to repeat step 2, 3 and 4.
Reading recommendation: In our blog article “Best practices for implementing the Net Promoter Score (NPS) in e-commerce” you will find helpful tips on how you can successfully use NPS for your company.
A widget, or mini application, describes a small program that is integrated into another program using a graphical interface. Described less technically, widgets are small windows within a website or software that display additional information.
This function could be used to send follow-up questions after the main survey. You can setup individual questions for every single measurement. This will help you to find out why the recipient has opted for this review.