Already have a Callexa account? Continue with Step 2.
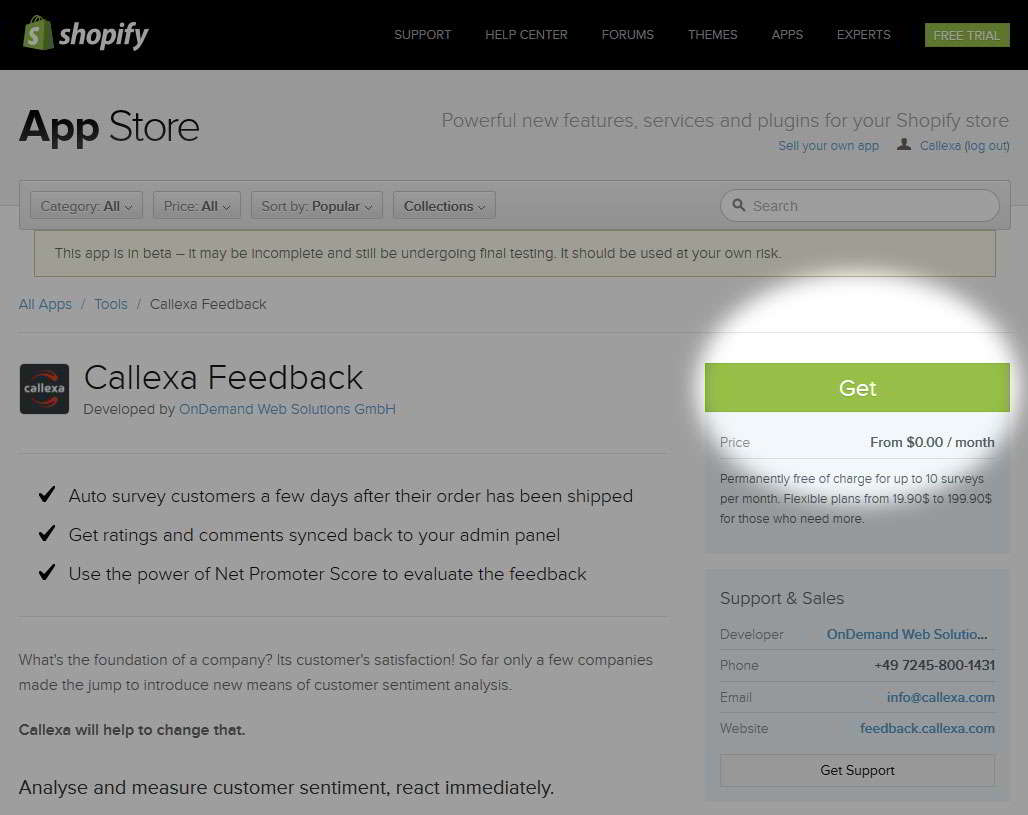
Log in to your Shopify Account and open this link. To install the Callexa app just click the green "Get" button. From now on you can access Callexa from your Shopify admin panel by clicking on the "Apps" entry in the sidebar.
Note: Installing the Callexa app for Shopify is non-binding and free of charge. Give it a try and if you are not happy just uninstall it (but please leave us a note on why).
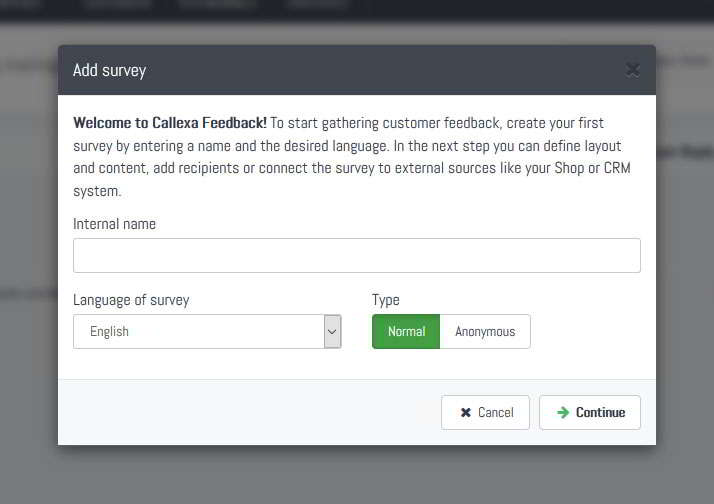
When you log in to your fresh Callexa account you are prompted to create your first survey. Just define an internal name, which will not be visible to your customers, set the language and submit.
On the next page customize your survey's layout, text blocks and follow-up questions. You can change all those settings at any time in the future. Read the guide "How can I create and customize a survey?" for more information.
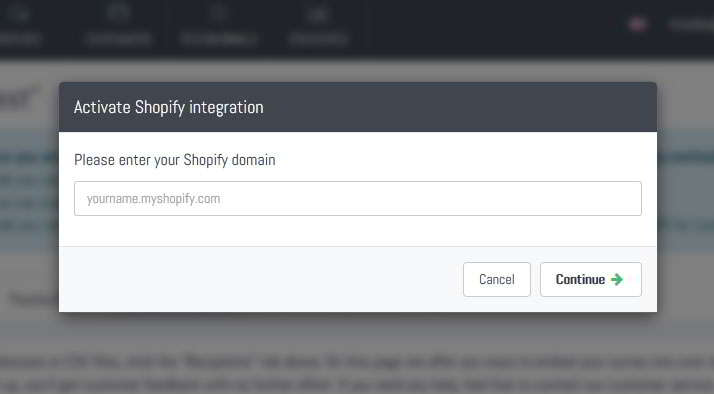
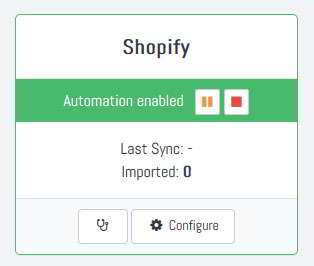
Surveys can have different sources for recipients. You can manually add emails addresses, import CSV files, use Website Widgets and so on. You can also create several surveys for different purposes. That is why the Shopify integration is not active by default. To activate it for the survey you just created, navigate to the "Integrations" tab, look for the Shopify card and click "Activate".
All we need to know is your Shopify domain name and you will get redirected to authorize Callexa access to your customer and order data. This redirection will be skipped if you have installed Callexa through the Shopify store as mentioned in Step 1.
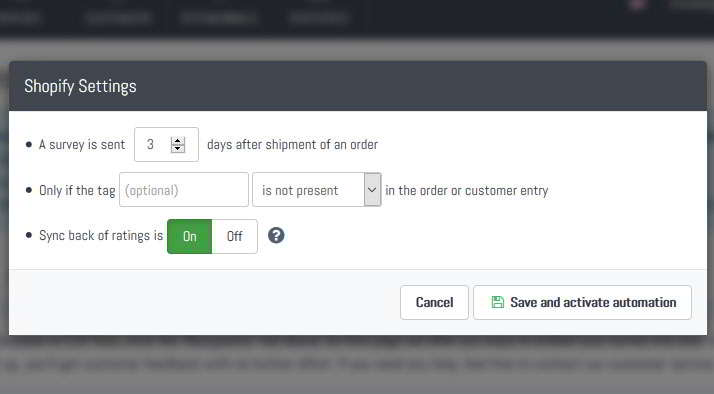
You are almost done. If activation was successful, you are prompted to specify a send delay. The customer is added to the recipients queue right after you've set an order to shipped. But in most cases you want to ask for your customer's opinion about the order process AND the shipped items. So use a reasonable delay considering your average delivery time plus a few days.
You can also define a tag that has to be present or should not be present in your Shopify customer or order entry in order to send a survey through Callexa. For example, if you do not want to survey all your Shopify customers after their order has been shipped, use a tag like e.g. "Survey" and set "is present". Now in the future add that tag to an order BEFORE setting it to the shipped state in Shopify. All orders not having this tag will be ignored by Callexa.
Actually yes. If the integration card is highlighted in green, from now on recipients will be added automatically and surveys are sent with the scheduled delay.
We recommend you to test drive your survey with an email address of your own. Check the guide "How can I add recipients manually?" for instructions.
Otherwise, you are all done. Just follow your usual routine at Shopify and wait for the first responses to come in.
Discover how Callexa NPS and feedback loops can transform your business by enhancing customer loyalty and driving growth through real-time insights and continuous improvement.
The new Callexa Feedback is slimmer, faster and clearer than its predecessor. The focus was set on a structural update that puts Callexa on a more robust footing. The main focus here is on the optimization of user management, data processing and data connection of external systems. The process has changed noticeably, especially in the area of survey-making and the replies.
Team collaboration, client feedback, and task management designed for web projects. Your clients report issues by making annotations right from the site being worked on. BugHerd turns these into full bug reports with all the info you need to fix the problem.
With Callexa Fedback, you can send customer satisfaction surveys with the NPS system. The actual sending of the NPS survey is relatively easy thanks to Callexa feedback. However, if the survey is sent at the wrong time, this can have a negative impact on the ratings.
Discover how to enhance your marketing with Callexa by setting up effective customer segmentation. Learn to tailor experiences and boost ROI through personalized strategies.
Discover how Callexa NPS can transform your approach to customer feedback, helping you enhance satisfaction and drive growth with easy-to-use surveys and insightful analytics.
Discover how Net Promoter Score (NPS) can revolutionize customer feedback on your online portal. Learn to implement, analyze, and optimize NPS for better customer engagement and business growth.
This case study aims to explore how WebWide uses NPS to gather actionable customer feedback, implement changes, and achieve measurable improvements. It delves into the methodology, benefits, challenges, and real-life impacts of using NPS, providing a comprehensive guide for other businesses looking to adopt this powerful tool.
Understanding and improving customer satisfaction is paramount for any business. NPS surveys with Callexa helps businesses to revolutionize how to gauge customer loyalty and feedback. This case study delves into the successful implementation and the transformative impact this can have on businesses.