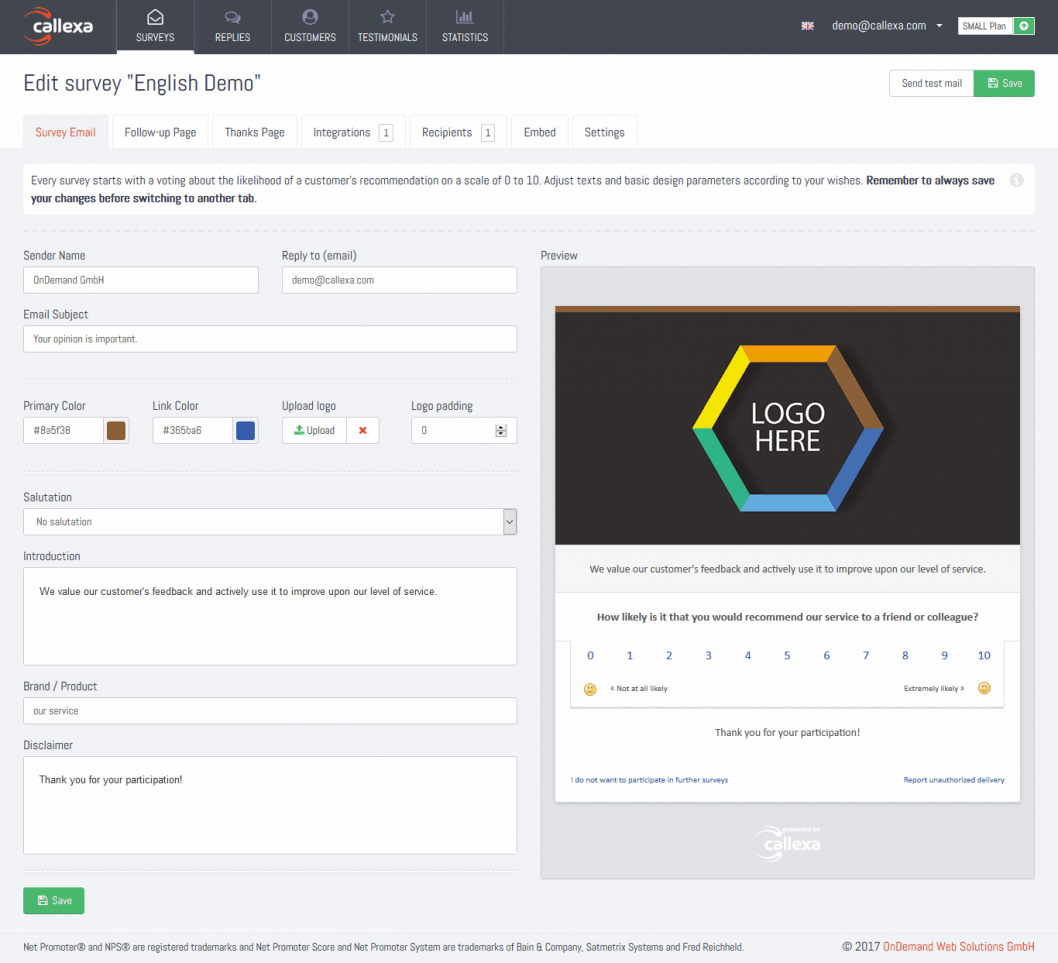
Our Net Promoter Score* based surveys consist of 2 steps. The first one is the voting scale from 0 to 10 allowing your customer to rate the likelyhood of recommending your service or product to a friend or colleague. This step is usually sent to your customer's by email or presented in the form of a website widget. And because this is easily done with just 1 click, our response rates are noticeably higher than those of ordinary survey forms.
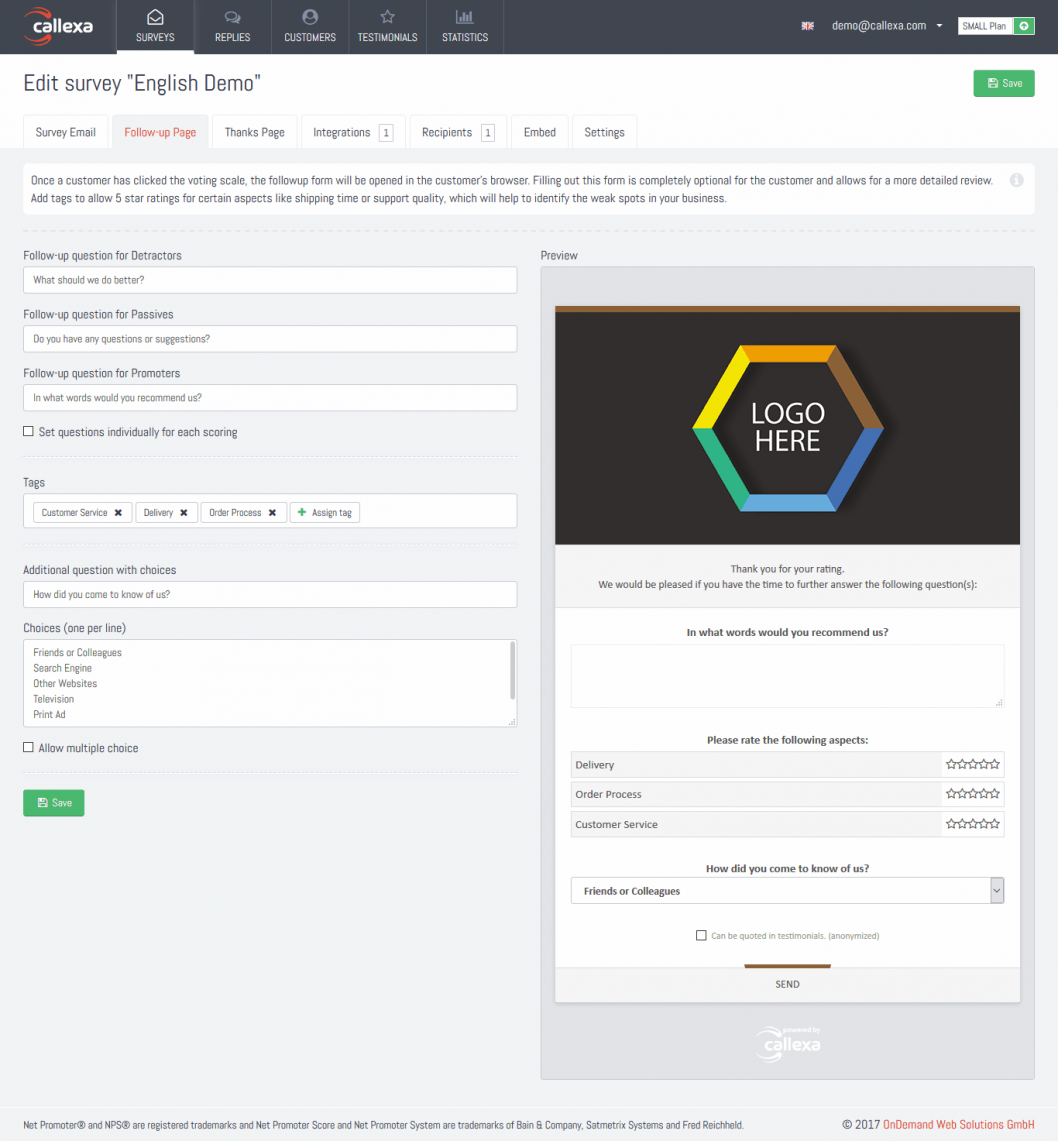
Afterwards the recipient is presented with a page containing a freely definable followup question allowing to comment on his or her rating. By using tags and an additional (multiple) choice question his or her feedback can be further refined. In case the recipient also completes this optional second step, a thank you page will be displayed with a customizable text. Including a coupon code or some other kind of gratification can help in getting better response rates.
Although our survey templates are already filled with reasonable defaults and ready to be sent right a way, the guide below will help you with customization for getting better and more suited feedback.
* Net Promoter, Net Promoter Score, and NPS are trademarks of Satmetrix Systems, Inc., Bain & Company, Inc., and Fred Reichheld.
If not done yet register your free Callexa account here. All you need is a valid email address.
When logging in for the first time you'll receive a notification „Welcome to Callexa Feedback“. Please fill in an internal name for this survey and choose the type of survey. With the type „Anonymous“ replies to this survey will be stored in no relation to the original recipient. This feature is recommended for employee attitude surveys.
The internal name is never visible to the survey's recipients. Since you can create more than 1 survey, use the name to differentiate between them.

Now configure the details of your survey's first step (the voting scale).
Always save your changes before switching to the next tab!
When a customer casts his vote through the voting scale a new page opens posing one of 3 followup questions depending on his ratings. Promoters (9, 10) should be asked to describe why they are satisfied. Good comments can be used as testimonials later on, using our testimonial widget. Passives (7,8) usually have small critisism, so ask them what suggestions they might have. Detractors (0-6) need the most attention and are often eager to express their problems with your service or product.
Another great way to get more detailed feedback is using tags. Adding a tag to your survey means the customers are asked to rate this aspect on a 5 star scale. Not few customer's are not willing to write comments, but still take the time to click some stars for giving a more fine grained rating what they were especially happy or unhappy about. We recommend adding no more than 5 tags which should be as short as possible, like e.g. "Shipping Time", "Customer Service" or "Product Quality".
Last but not least a (multiple or single) choiche question can be added to the form.
Always save your changes before switching to the next tab!
Customer's who filled the 2nd step form will be redirected to this thank you message, which is fully customizable. You can add information on ways to contact your customer service or even add a coupon code. If you mention a coupon in the introduction text (see step 3), it's much more likely for your customers to fill out the followup questions.
Always save your changes before switching to another tab!
Now that your survey template is complete, you are ready to add recipients. There are many ways to start surveying, so please refer to one of our guides:
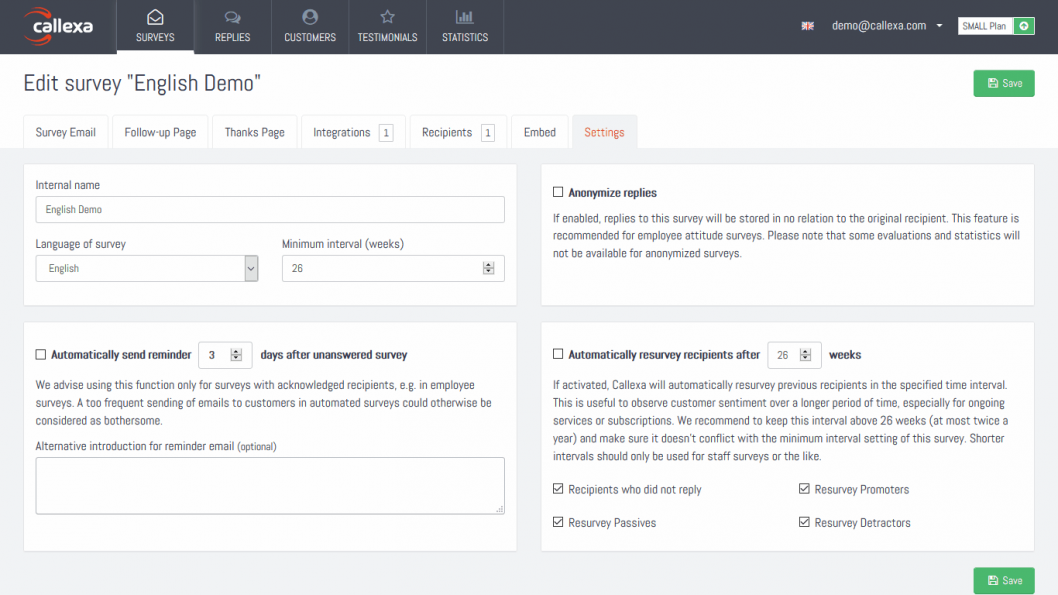
Navigate to the "Settings" tab of your survey to see additional features available in your plan.
While many people consider Net Promoter Score® surveys to be a simple rating scale from 0 to 10, in reality NPS® has two sides - the quantitative (the rating) and the qualitative (the feedback) side. Just as an unanswered email is frustrating for the average user, there are few things that discourage a customer satisfaction professional more than an NPS survey that was only given a rating but no qualitative feedback.
The title of the blog article poses an exciting question that all companies should ask themselves that want to survey their B2B customers with the Net Promoter Score in order to receive feedback.
Discover how Net Promoter Score (NPS) can revolutionize customer feedback on your online portal. Learn to implement, analyze, and optimize NPS for better customer engagement and business growth.
The customer survey via Net Promoter Score® has the advantage over other forms of survey in that you receive relevant customer feedback promptly when you need it most.
Comparing NPS is not a straightforward process as the customer satisfaction metric depends on many factors. This can be made clear on the basis of current studies. For example, companies in the automotive sector have an average NPS score of 39, with a lowest value of just 20. For Internet service providers, however, the average NPS value is 16, with a maximum value of only 19.
Discover how to automate NPS surveys in your tech stack with our step-by-step guide. Enhance customer feedback and loyalty effortlessly!
Unlock the full potential of NPS surveys by tailoring them to your unique business needs. Learn how customization, integration with CRM, and actionable insights can transform customer feedback into growth opportunities.
Discover how to master NPS integration in complex organizations for improved customer loyalty and actionable insights. Learn key considerations, best practices, and real-world success stories.
Discover how NPS Data Sync and Import automation can transform your customer feedback management. Learn the benefits, challenges, and best tools for seamless integration and data-driven decision-making.