The most comfortable way to use Callexa is to use one of the available integrations or our REST API to automate the import of recipients. But if that's not feasable or if you just want to survey a manageable amount of customers, staff members or partners we offer 2 options for manual import:
There is a shortcut to the recipients queue in the "Mailings" column of your surveys list. Or if you are in the "Edit" overview of the survey just click the "Recipients" tab.
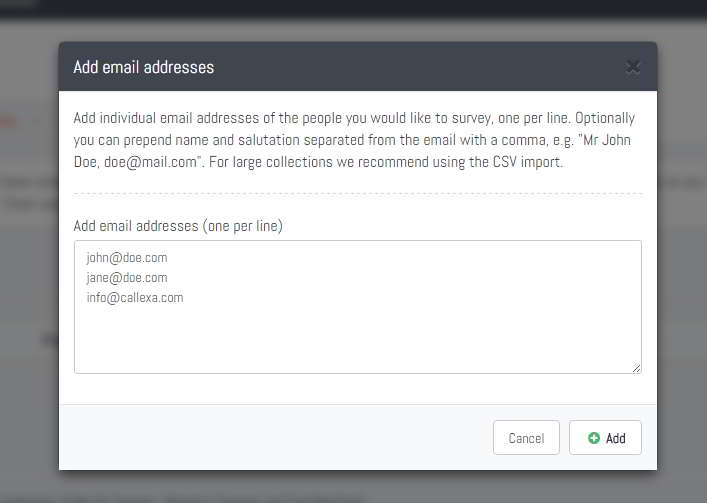
In the top right corner click the button "Add recipients" and chose "Add email addresses". A dialog box will open where you can enter your email addresses, one per line.
We recommend to keep the number of email addresses below 100, for large collections use the CSV import described below.
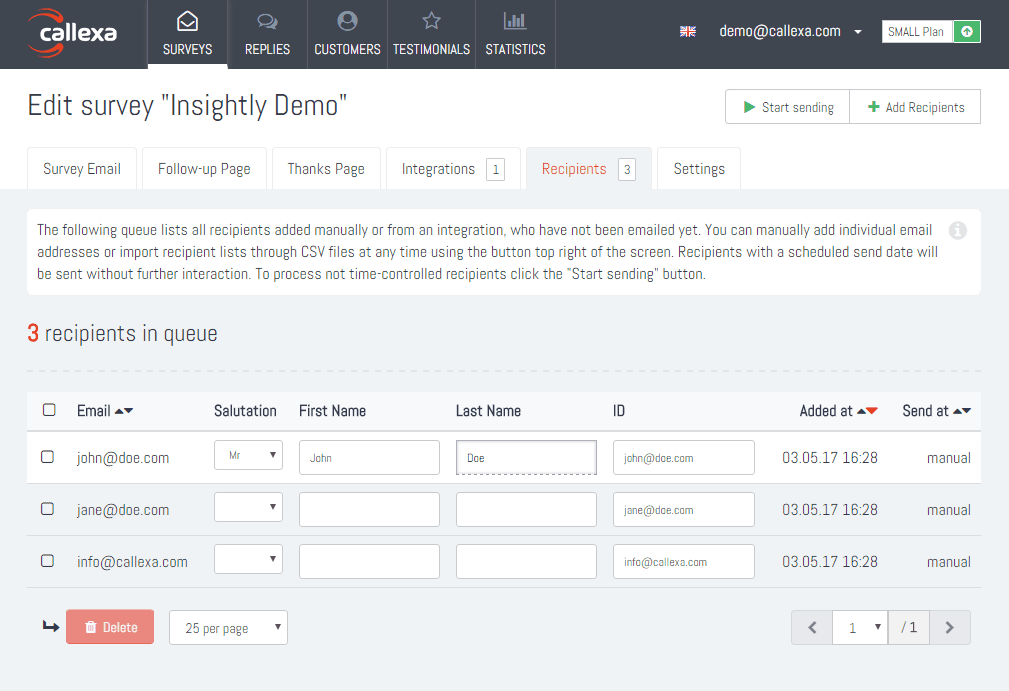
All emails will be checked for validity and added to the recipients queue. Unless a recipient has already been surveyed in the last 26 weeks, which is the default minimum interval for surveys. You can adjust this interval on the "Settings" tab of your survey.
Feel free to add or edit salutation and name in the queue list. Changes to those fields will be saved automatically and remembered for future surveys of the same email address.
As you can see the last column "Send at" says "manual". That means to finally start emailing your manually added recipients you must click the "Start sending" button in the top right corner.
There is a shortcut to the recipients queue in the "Mailings" column of your surveys list. Or if you are in the "Edit" overview of the survey just click the "Recipients" tab.
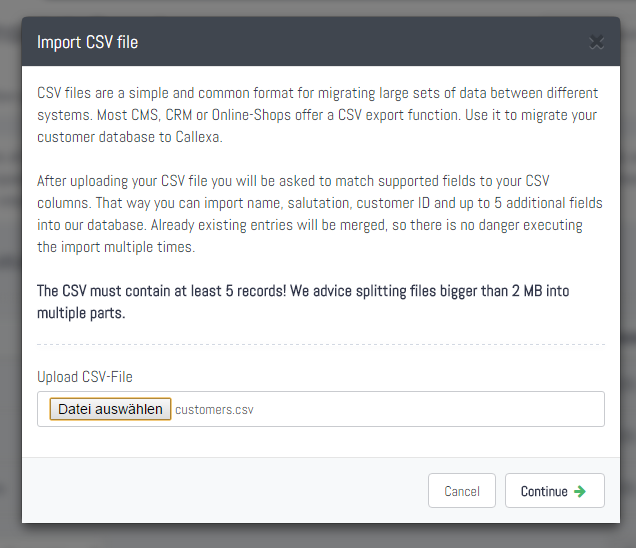
In the top right corner click the button "Add recipients" and chose "Import CSV file". A dialog box will open where you can browse for the file located on your computer.
Please keep the size below 10 Megabytes, split it into mulitple files if needed.
Common formats exported from Excel, Libre Office or Open Office have been tested and should work right away. If you experience any problems please contact customer service.
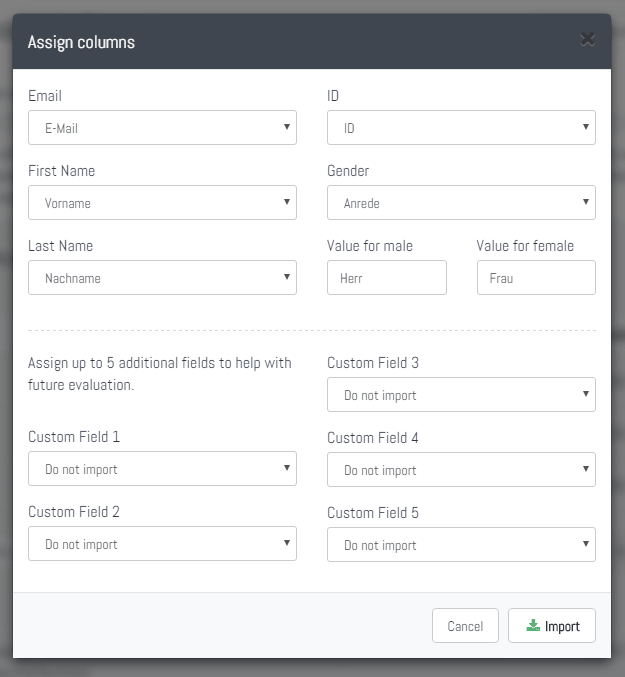
Callexa will try to automatically detect the used CSV file format. On success you will be presented with a dialog where you can assign the columns used in the CSV file to the fields Callexa can process. The only required field is the email address. All other fields do not have to be present in the CSV file.
Please contact customer service in case column matching failed and you are not able to select the appropriate values.
There are two special fields requiring further explanation. The "ID" field is a unique identifier for the customer entry. By default the email address itself can be used for this purpose. But in case your CSV file contains real IDs from other systems, we recommend assigning that column.
The gender field is useful if you enabled a full salutation in your survey email template. If present in your CSV file assign the matching column and enter the 2 possible values used in the file, e.g. "Mr" and "Mrs". If a line does not match those, the customer is still imported but without a salutation.
Depending on server load and file size, the import process can take a few minutes. Please be patient but contact customer service if it takes longer than half an hour.
When done all successfully imported recipients are displayed in the queue. As you can see the last column "Send at" says "manual". That means to finally start emailing your manually added recipients you must click the "Start sending" button in the top right corner.