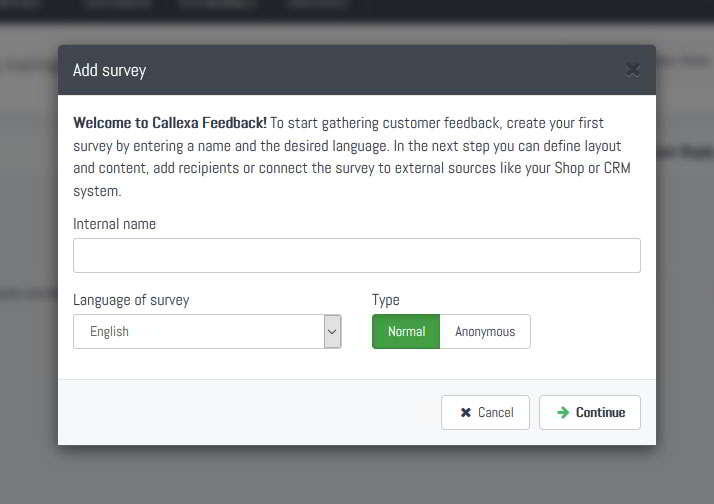
When you first login to your fresh Callexa account you are prompted to create your first survey. Just define an internal name (not visible to your customers), set the language and submit.
On the next page customize your survey's layout, text blocks and follow-up questions. You can change all those settings at any time in the future. Read the guide "How can I create and customize a survey?" for more information.
To connect your Desk.com account with Callexa it is necessary to create a so-called "API Application" in your Desk.com Admin Panel. In case you are still in the agent view of your Desk.com account, switch to the Admin view by opening the sidebar and selecting "Admin". Then follow the steps as outlined in the screenshot:
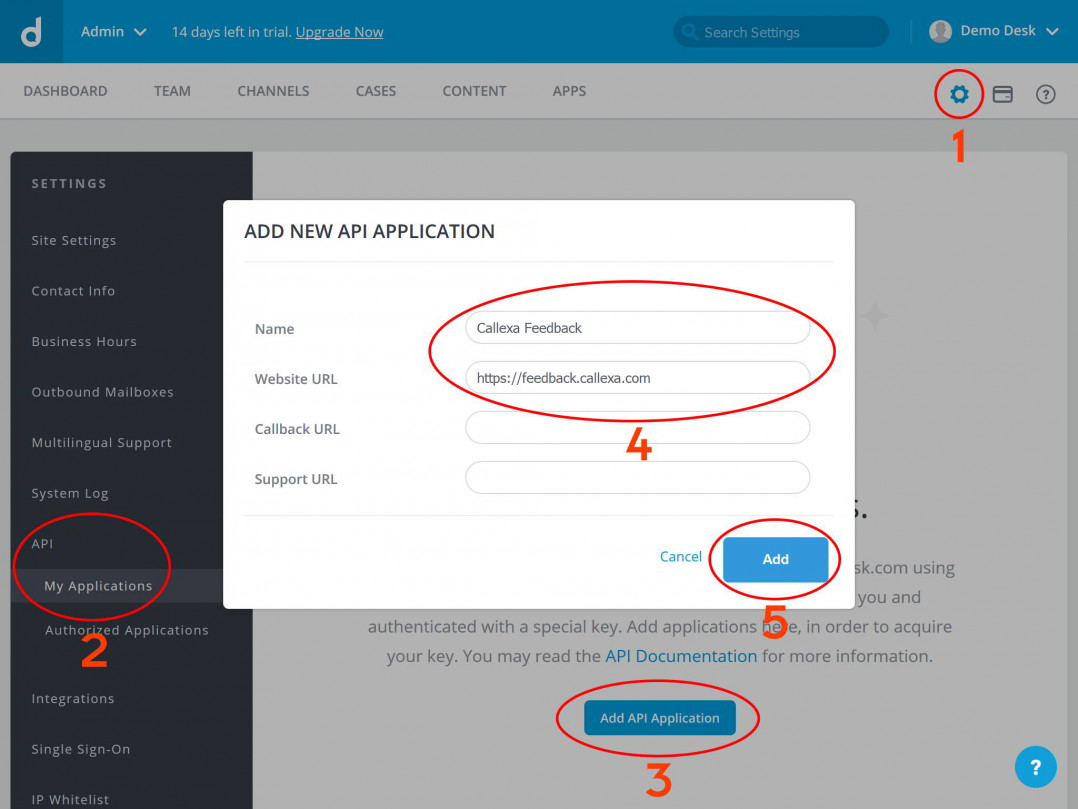
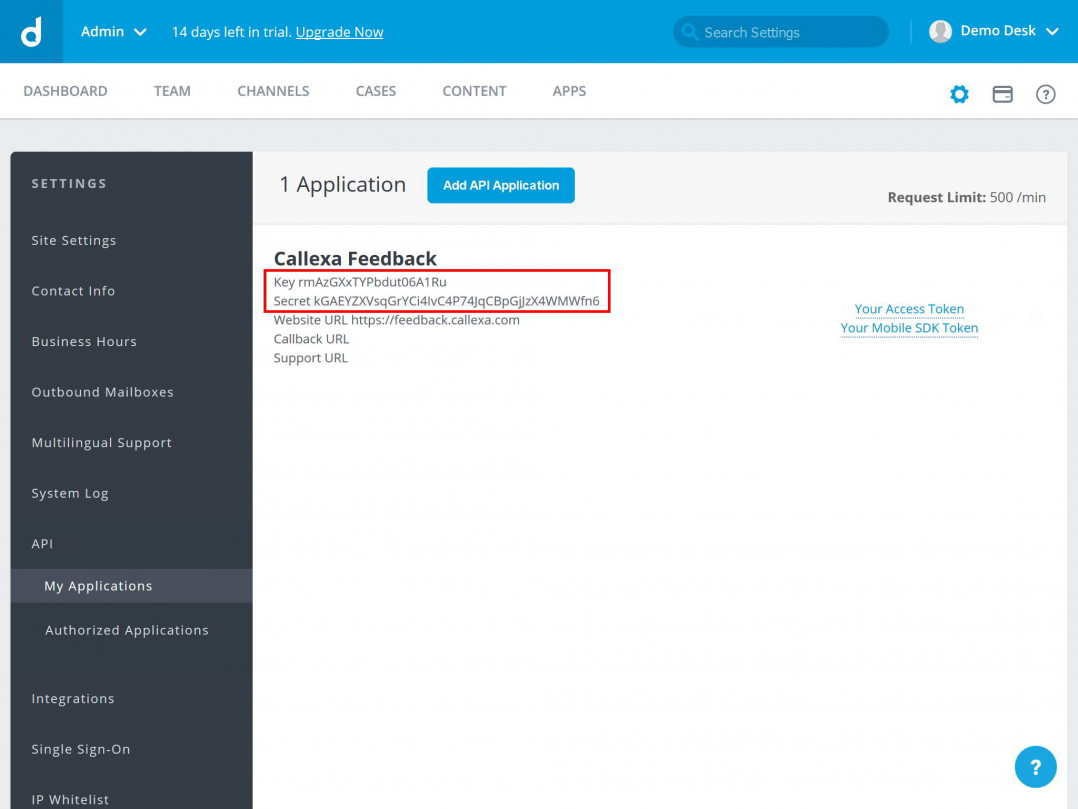
A new entry will appear including 2 strings called "Key" and "Secret". You will need those in the next step.
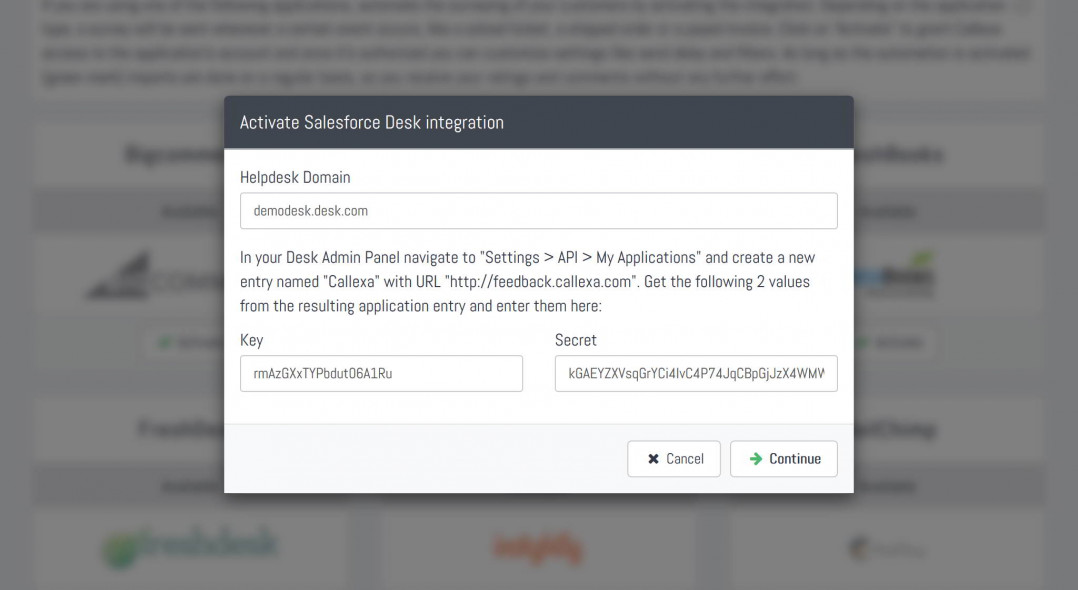
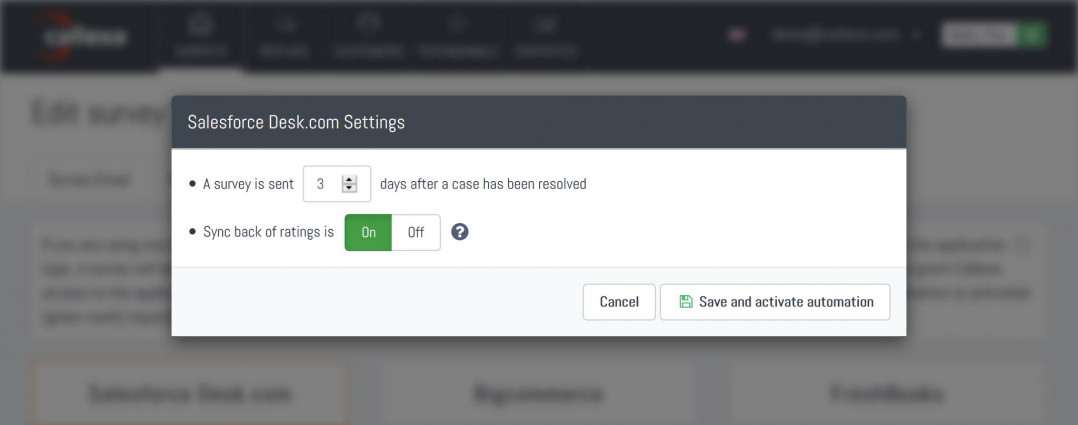
Back to Callexa. Click the "Integrations" tab of your survey, look for the Desk.com card and click "Activate". A dialog will appear asking for 3 values:
Paste those values into the matching fields and hit "Continue". You will be redirected to a page asking you to grant Callexa Feedback access to your Desk.com account.
Note: Callexa will only read the ID and resolve date of a ticket, as well as the email address and full name of the assigned customer. We do not store or process any other content from your Desk.com account.
You are almost done. If activation was successful, you will be prompted to specify a send delay. The customer is added to the recipients queue shortly after an agent has set a ticket to resolved. You can either let Callexa survey your customer right away by setting a delay of 0 days or let it wait a few days.
It's also possible to enable the back sync capability. Incoming ratings and comments will then be attached to the ticket and customer entry as a note right in your Desk.com account.
Actually yes. If the integration card is highlighted in green, from now on recipients will be added automatically and surveys are sent with the scheduled delay.
We recommend you to test drive your survey with an email address of your own. Check the guide "How can I add recipients manually?" for instructions.
Otherwise, you are all done. Just follow your usual routine at Desk.com and wait for the first responses to come in.

Create your online course, training program, or other business idea inside your existing Squarespace website - no need to build on someone else's platform! Choose which pages and content to protect. Charge for access to your protected pages and content. Visitors must sign up or log in before viewing your protected pages and content.
Team collaboration, client feedback, and task management designed for web projects. Your clients report issues by making annotations right from the site being worked on. BugHerd turns these into full bug reports with all the info you need to fix the problem.
With Callexa Fedback, you can send customer satisfaction surveys with the NPS system. The actual sending of the NPS survey is relatively easy thanks to Callexa feedback. However, if the survey is sent at the wrong time, this can have a negative impact on the ratings.
Whether it's processing data or incorporating a range of analytical tools to understand customer engagement; Basically, it is about letting as many processes as possible run independently and 24/7, while you can use the free time for other tasks.
In our today's edition of Callexa Feedback Integration series we want to introduce the service SharpSpring closer.SharpSpring is a highly-rated global provider of affordable, cloud-based marketing automation. Marketing agencies and businesses around the world rely on SharpSpring to generate leads, improve conversions to sales, and drive higher returns on marketing investments.
The new Callexa Feedback is slimmer, faster and clearer than its predecessor. The focus was set on a structural update that puts Callexa on a more robust footing. The main focus here is on the optimization of user management, data processing and data connection of external systems. The process has changed noticeably, especially in the area of survey-making and the replies.
Discover how to boost customer loyalty with top NPS monitoring tools. Learn the benefits, challenges, and essential features for effective customer sentiment analysis. Get insights on choosing the right tool for your business size and needs.
Discover how to enhance your marketing with Callexa by setting up effective customer segmentation. Learn to tailor experiences and boost ROI through personalized strategies.