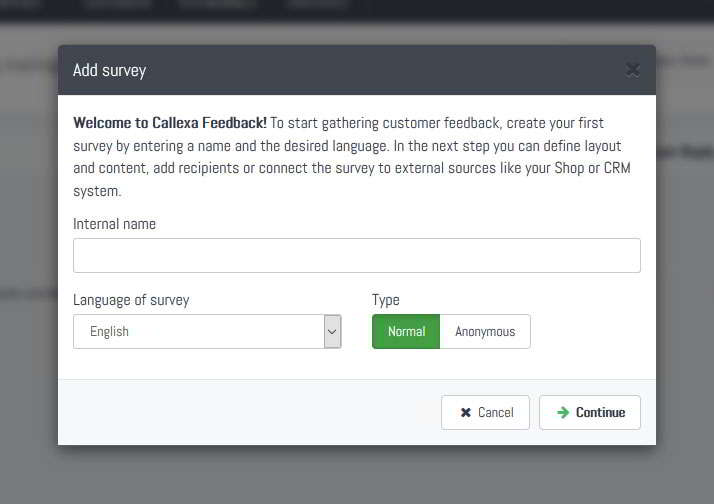
When you first log into your fresh Callexa account you are prompted to create your first survey. Just define an internal name (not visible to your customers), set the language and submit.
On the next page customize your survey's layout, text blocks and follow-up questions. You can change all those settings at any time in the future. Read the guide "How can I create and customize a survey?" for more information.
Now click the "Integrations" tab of your survey, look for the Mailchimp card and click "Activate". You will be redirected to Mailchimp in order to grant Callexa authorization to your Mailchimp account.
Note: Callexa will only read the IDs, subscription dates, as well as the email address and full name of the subscriber. We do not store or process any other content from your Mailchimp account.
If the authorization was successful, you will be prompted to configure the settings for the automated import. You must select at least one mailing list (or segment) to import from. If you select a segment, make sure that you do not select the main list as well.
You now have 2 options (see step 3b):
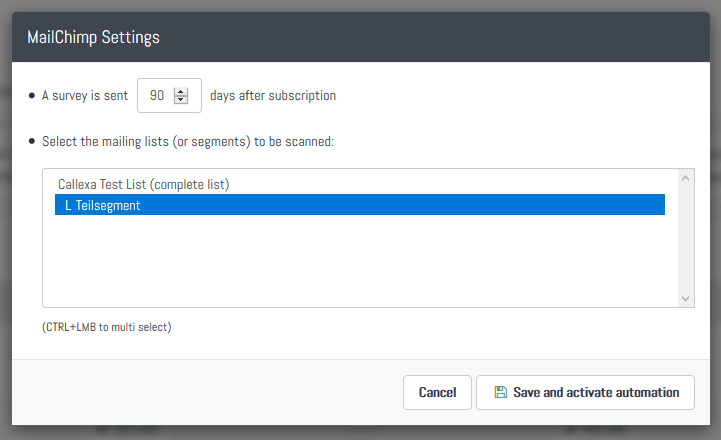
Control yourself when you want to send surveys. Select a mailing list but then hit "Cancel" to leave the automation disabled. The Mailchimp integration card will stay yellow, meaning that the automation is paused.